Tutorial: Sandpaper
Hello, Dear Readers!
When I first started painting all the things, I wasn’t sure what type of sandpaper to use and when (or if) to use it. If you’re in the same boat this tutorial is for you!
What do the numbers on sandpaper mean for the love of Pete??
Simply put: the lower the number on the sandpaper, the rougher it is. The numbers represent what’s called the “grit” which is how rough the paper is. The lower the number, the bigger the little bits of “sand” are and the more of the surface they will remove from your project. Run your fingers over the different grits and you can feel the difference.
Start with the lower numbers and work your way to the higher ones until your project feels smooth to the touch. If it’s already pretty smooth (no major gouges or rough spots), start with the middle to higher numbers.
Let’s break it down.

You can see the difference in the grits! Left to right: 80 grit (very rough), 150 grit (medium), and 220 grit (fine).
This list isn’t comprehensive; these are the ones I regularly use and recommend for you.
80 grit is very course and is useful for evening out a very rough surface or removing a painted or shiny finish. It leaves a surface that is not super smooth to the touch. This one is kind of a brute, so tread lightly with it until you know what it’s capable of.
100 grit will also remove finishes. It’s useful for smoothing a medium-rough surface such as raised wood grain (ridges in the wood that stick up from the surface) or removing rust from a metal object.
120 and 150 grit are used to further refine a surface…or you may start with one of these if your project just needs to be touched up to make it all feel even.
220 is a fine grit and will leave your surface smooth when you run your hand over it. You can use this sandpaper to sand between coats of paint when using chalk paint or latex paint to smooth out any brushstrokes (no sanding needed between coats of spray paint). This is also what you would use to sand between coats of polyurethane or other topcoats…again, to knock down any brushstrokes before recoating.
320 is super fine and leaves surfaces shockingly smooth! I use it for the final sanding. I also use it for sanding between coats of chalk and/or latex paint (instead of or after the 220) because I like how suuuuper smooth it leaves the surface. Like butta!
I recommend buying a multi-pack of sandpapers with different grits so you always have the right one(s) on hand.
Life is about choices.
Ok, thanks, super helpful, but how do I know when I should sand my project?
When not to sand:
Finish is already smooth/undamaged
Painting with spray paint and surface is smooth/undamaged with no peeling paint
Chalk paint (if current finish is shiny, you will need to prime…find more on that in my chalk paint post)
When to sand:
Rough or uneven surface (splinters, rust, chipping or peeling paint)
Removal of an old finish
Painting with latex or acrylic paint
**Public Service Announcement: Always wear the proper protective equipment when sanding, whether by hand or with a power sander. A mask or respirator to protect your lungs from inhaling the tiny, itty bitty particles of “sand” and whatever material is being sanded, and eye protection so nothing flies up into your eyes.
How will you sand things in the future if you can’t see or breathe?

Safety is the new sexy. Also that’s not a helmet, just my hair. I’ll work on that.
Let’s do this!
Prep:
Clean your project with soap and water, then let dry. You don’t want to grind dirt and grease into the surface.
Especially if it’s a thrifted item, it’s probably dirtier than you think. People can be really gross.
Sanding by hand:
Tear the sandpaper into strips, then fold it into a shape that fits your project.
Tip: when tearing a smaller piece, write the grit number on the back so you can identify it later.
You don’t want to have a box of leftover mystery bits of sandpaper (not speaking from experience or anything...).
Alternatively, you can buy blocks that you can attach the sandpaper to, or pre-sandpapered blocks. I find these cumbersome but you do you.
Start gently! Rub the paper back and forth on your surface. If your project is wood, sand in the direction of the grain (the natural lines in the wood) which means parallel to the grain NOT perpendicular to it. Sanding against the grain or in circles can show through in your final finish.
You will get a feel for it (literally!) as you do your projects. Run your hands over the surface fairly often as you go. Play with different grits until the surface feels the way you want it to.
Power Sanding:
A power sander is not necessary…but it’s nice. If your project is large and flat or has stubborn rough spots, a power sander will save you time and elbow grease. The grits work the exact same way; lower number = rougher paper. The paper is round, rectangular or pointed on one end (what you need depends on the sander you have) and there’s velcro on the back that sticks it to the sander.

This is the power sander I use. It was a gift from my Dear Husband for my birthday a few years back and I really like it. The size fits my hand perfectly and I can control it (which also takes a little practice!). It has a pointy end to get into smaller spots and square edges which I really appreciate. If you are planning to do a big project or multiple projects, this is super handy and time-saving. And fun!!
Be sure to add ear protection to your PPE when using one of these.
Practice on a scrap piece of wood! You want to get a feel for how it vibrates and kind of wants to run away with you if you aren’t holding on real tight, and also how much pressure you need to use.
Don’t be intimidated, you can do this!
This pic also gives you perspective of my sander’s size. It’s not the biggest, nor the smallest available.
It’s like Goldilocks…just right!
For some projects you may choose to do a combination of power sanding and hand sanding.
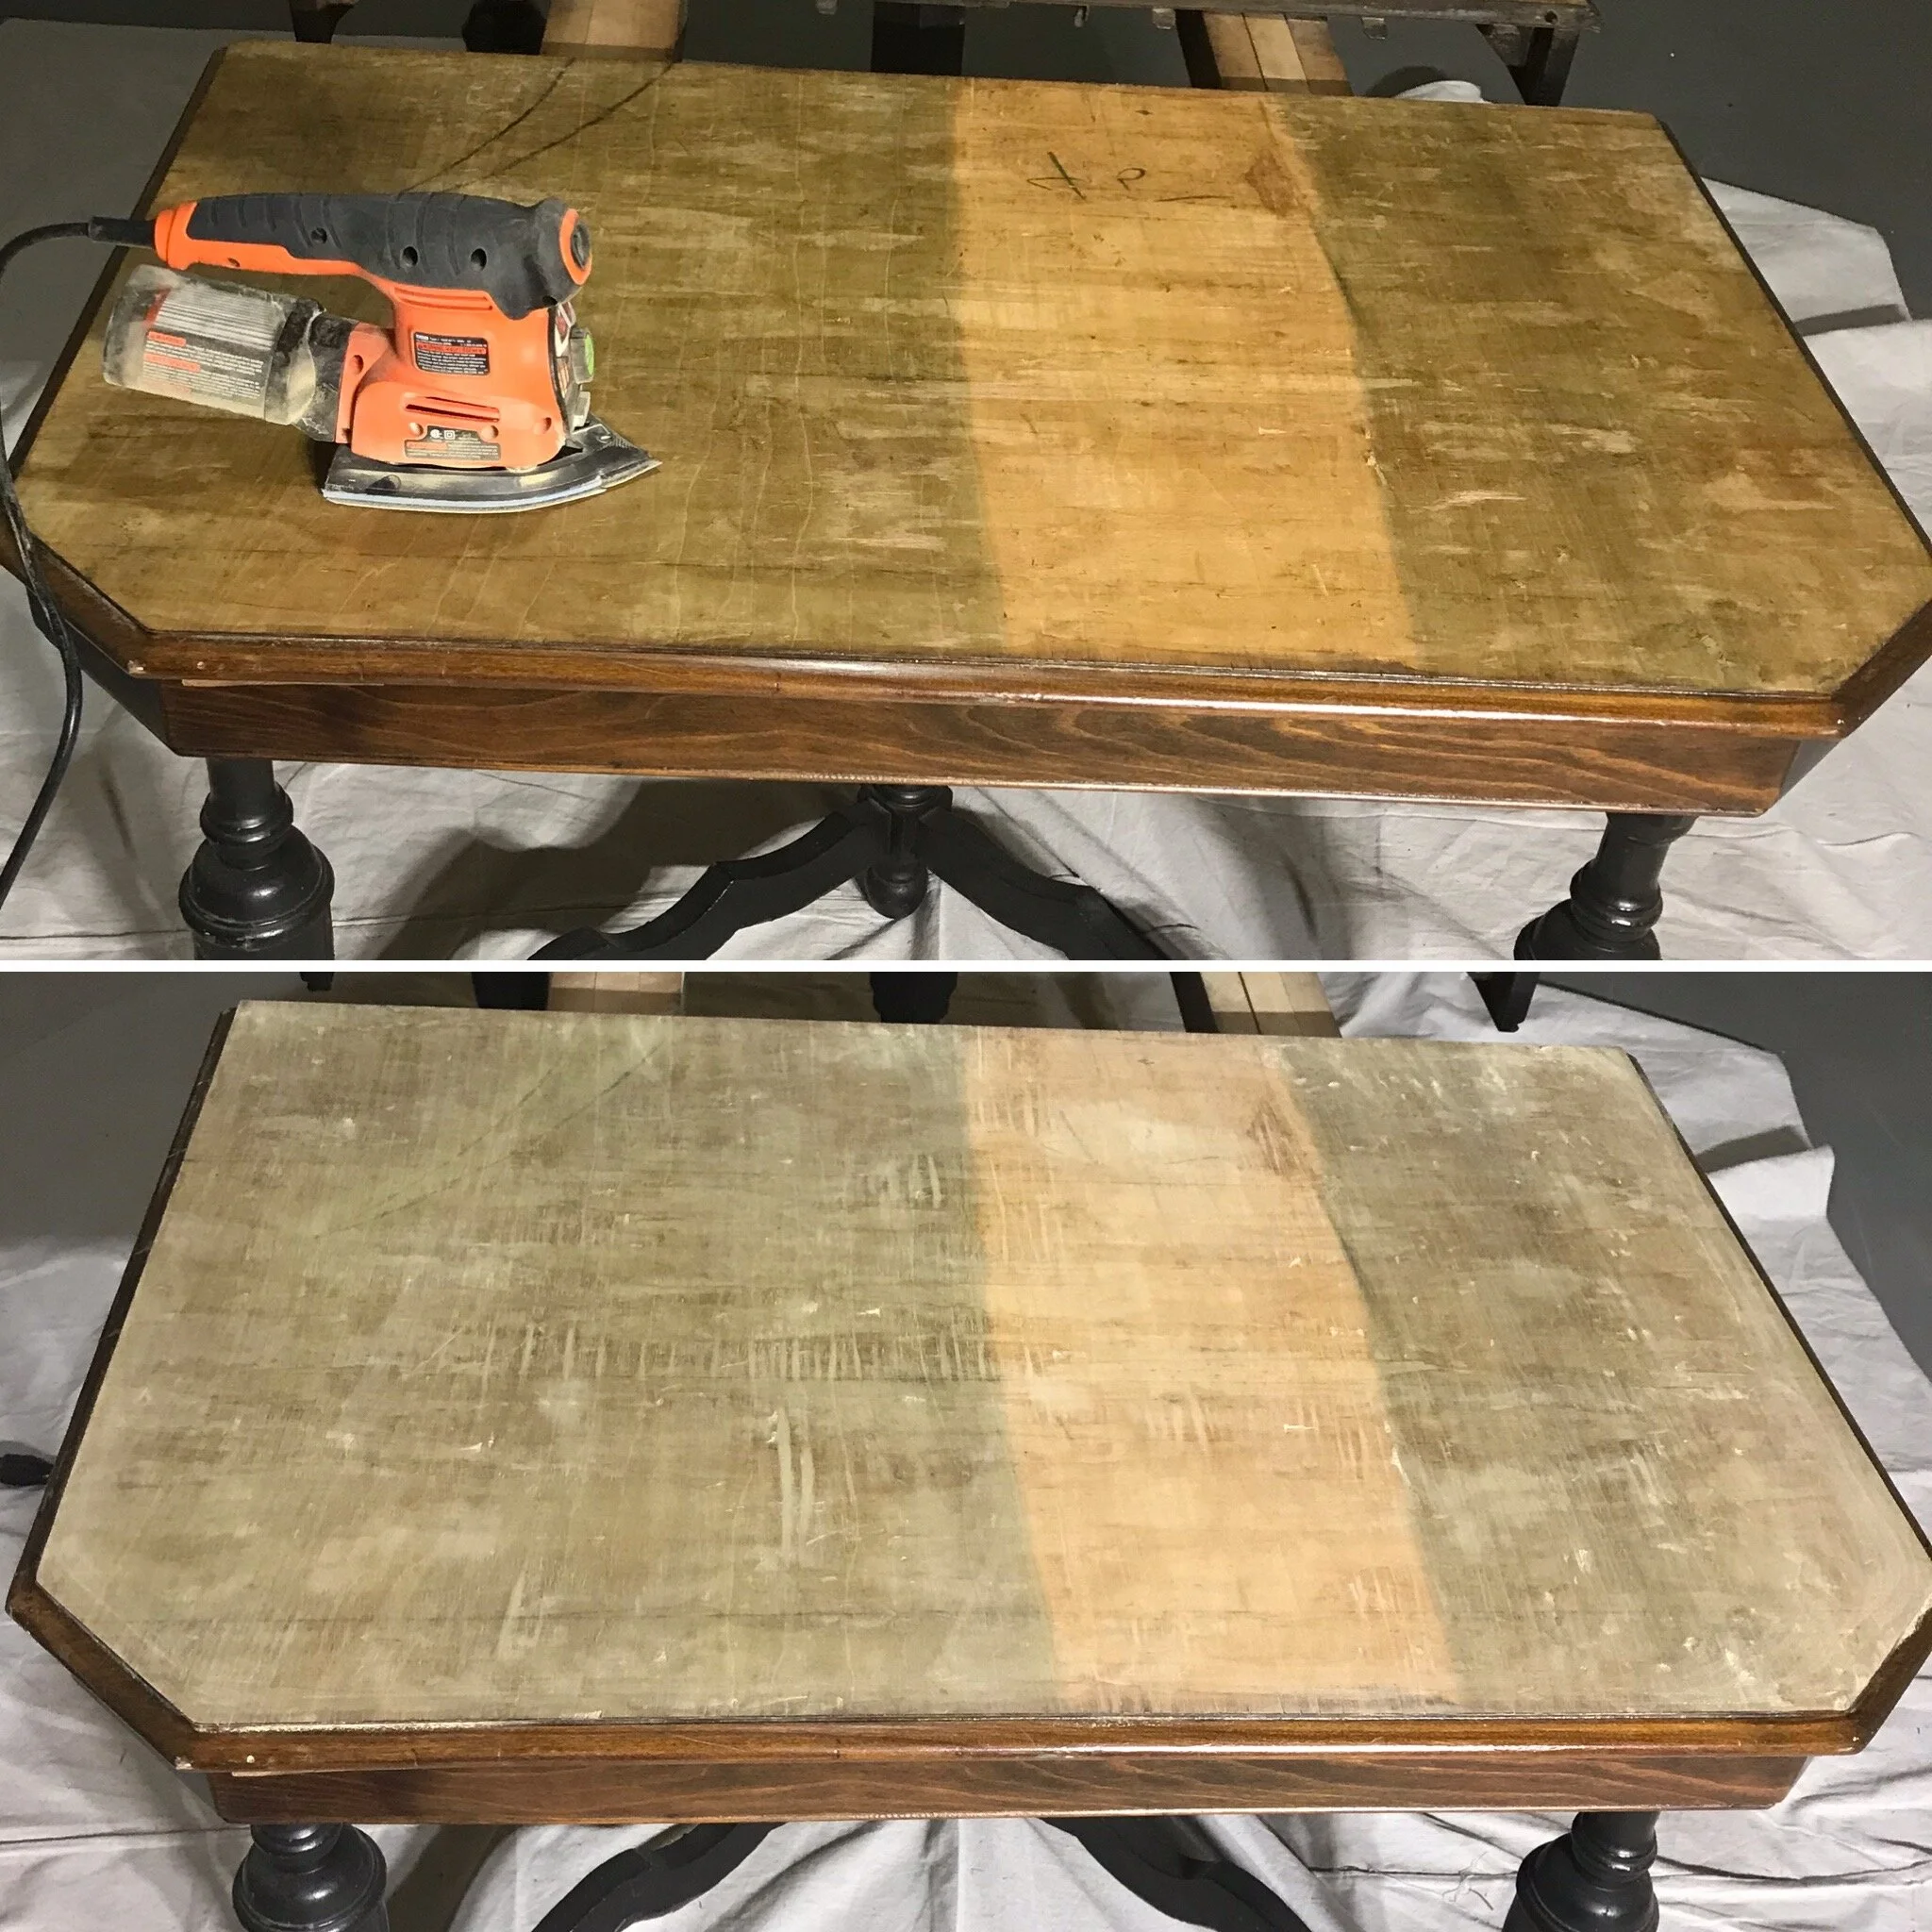
After I peeled the veneer off of my kitchen table top (you can see the whole story here!), the surface was very rough and there were bits of glue that I couldn’t scrape off by hand (top picture). I used my power sander with an 80 grit, then 120 and 22o. I did the final sanding with 320 by hand because it was quick and I felt like I had better control that way.
Remember: Practice, practice, practice! The more you do this stuff, the better and more comfortable you will get. If things aren’t perfect, that’s more than ok! Perfect is boring. Imperfect means your projects have character.
And boy do some of my projects have character, my friends.
As always, I hope this tutorial was helpful and I’m just a click away if you have questions!
Hugs, Jen
